The Problem
Recently, I needed three-digit numbers and their corresponding barcodes on 4x3 labels. I wanted somewhere in the range of one to three-hundred, all similar to the cover image of this post. Unsure how to proceed, I searched online for some ready-made solutions. As it happens, the web is lousy with “barcode generator” sites. Distractingly full of ads, the several I tried required the user to manually enter the data to be converted into a barcode. One at a time. And then proceed to download them - one at a time.
This was too slow and awkward a method. Although this may work fine for one-offs, I didn’t want to manually enter each number. I found some Excel/LibreOffice Calc solutions, but I wanted more customizability. I also came across some paid solutions, but I was not interested in that route. So, I figured I’d try my hand at solving the problem myself. Audere est facere.
My initial plan:
- write a program or script that would incrementally generate numbered barcodes based on a predefined interval. For example,
[1, 200]would generate barcodes corresponding to numbers1to200. And then: - make a composite image with the generated barcode and the corresponding number.
Simple enough. Yet before going over this project in depth, first we need a primer on barcodes.
A Brief History of Barcodes
Most people are familiar with barcodes, usually from shopping, or owning virtually any product. In short, barcodes are a representation of data (such as numbers, letters, and other characters) in visual, machine-readable form. A symbology is a mapping between messages (data) and barcodes. A variety of symbologies exist and are in use today.
First generation linear barcodes, or one-dimensional barcodes consist of lines and spaces of varying widths.
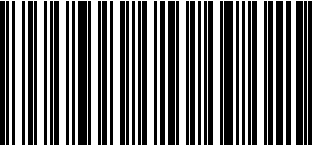 garcia.casa in code128 symbology
The Universal Product Code is a widely used barcode symbology for trade products. UPC is made up of 12 digits representing a unique item. These are what you typically see in department and grocery stores.
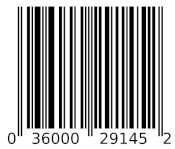 UPC barcode. Source: Wikipedia
There are also two-dimensional barcodes, such as the now common QR Code1, among others.

But the notion of data encoded in machine-readable format goes back to the use of punch cards, such as those used by Joseph Jacquard’s loom. Punch cards are something like a primitive form of barcodes, using binary information for the storage and retrieval of data.
Fast forward to 1972, when the UPC is developed at IBM. One year later, it is adopted by the grocery industry. Now, integrated QR code readers are default on most new phones.
Code 128
For my purposes, I used the linear barcode symbology Code 128. It’s a higher density barcode, which was important because of the space constraints of the project.
treepoem
To create the actual barcodes, I used a python renderer called treepoem. Treepoem wraps the Barcode Writer in Pure PostScript (BWIPP) library and the Ghostscript command line tool. It has an easy-to-use API that made this part of my project much easier.
Installation
My dev machine is running Ubuntu 20.04, and so all of the instructions that follow are written in terms of that OS. Presumably they work on other versions and Debian, but YMMV.
Note: It’s recommended to create a virtual environment before installing any new python packages. For instance,
python -m venv barcode-env.
First, I needed to make sure Ghostscript was installed on my dev system:
sudo apt install -y ghostscript
Then, I installed treepoem using pip:
python -m pip install treepoem
Basic Usage
After reading over some of the treepoem documentation, I could easily create barcodes. Below is the python snippet calling the API to generate the garcia.casa QR Code.
# garcia-qr-code.py
import treepoem

image = treepoem.generate_barcode(
    barcode_type = "qr-code",
    data = "garcia.casa",
)

image.convert("1").save("garciacasa-qr-code.png")
And here is the snippet for the Code 128 barcode for garcia.casa:
# garcia-code128.py
import treepoem

image = treepoem.generate_barcode(
    barcode_type = "code128",
    data = "garcia.casa",
)

image.convert("1").save("garciacasa-code128.png")
Let’s take a closer look and analyze the Code 128 snippet. First, the image object is created:
imageis a PIL image file object, specificallyPIL.EpsImagePlugin.EpsImageFile- The
generate_barcodemethod creates the barcode barcode_typetakes the name of the barcode type, in our case code128, which can encode all 128 ASCII charactersdatais a string (str) orbytesof data that is encoded into the barcode
Next, we call the convert method. From the pillow documentation, this method returns a copy of this image.
# method signature
Image.convert(mode=None, matrix=None, dither=None, palette=0, colors=256)
We pass the
modeargument to ourconvertmethod. The mode of an image is a string which defines the type and depth of a pixel in a given image. Every pixel uses the full range of the bit depth. In other words, a1-bitpixel has a range0-1, an8-bitpixel has a range0-255, etc. Here, I use the1mode: 1-bit pixels — two colors, black and white — stored with one pixel per byte. 1-bit color images are also known as a binary image. 2
Lastly, we call the save method on our image, which saves the image under the provided filename, garciacasa-code128.png.
I’ll Take 200, Please
Now that I could generate a barcode for a given number, I needed to create a range of barcodes. Specifically, barcodes representing every number between 200 and 400, inclusive. More formally: *for every x Є [200,400], create a barcode in Code 128 representing x*. In pseudocode, this would be something like:
for each x in [200,400]
    barcode = generate_barcode(x)
    save(barcode)
And after translating to python, we get:
# generate_barcodes.py
import treepoem

for i in range(200, 401):
    barcode = treepoem.generate_barcode(
        barcode_type = "code128",
        data = str(i),
    )

    filename = str(i) + ".png"
    barcode.convert("1").save(filename)
I ran python generate_barcodes.py and it worked as intended. The barcodes/ directory now contains all the barcode images. Below is the full, cleaned-up version of generate_barcodes.py.
import treepoem

def generate_barcodes(x, y):
for i in range(x, y):
barcode = treepoem.generate_barcode(
barcode_type = "code128",
data = str(i),
)

        filename = "barcodes/" + str(i) + ".png"
        barcode.convert("1").save(filename)
        print("Barcode " + str(i) + " created")
    print("Barcode generation complete!")

def main():
x = 200
y = 401
generate_barcodes(x, y)

main()
Adding Numbers
Next, I needed to create new images using the newly generated barcodes and their corresponding numbers. My plan was as following:
- iterate through all the barcodes in the
barcodesdirectory - Using Pillow, the fork of the Python Imaging Library (PIL), create a new base image the scale of the labels (4x3)
- Add text to the base image, specifically the current number associated with its barcode
- Add the current barcode image to the base image
- Save the new composite image
Pillow: Python Imaging Library (PIL)
From the PIL library, I needed to import the Image, ImageDraw, and ImageFont modules3 into my script. But first, I created a blank white image using GNU Image Manipulation Program (GIMP) with dimensions of 600x400 pixels. I exported the image from GIMP as base.png.
Behold:

Impressive4, I know.
Next, I created Image, ImageFont, and ImageDraw objects for my text:
# add_nums.py
from PIL import Image, ImageDraw, ImageFont

with Image.open("base.png").convert("RGBA") as base:

    # load base image, font, and draw objects
    text = Image.new("RGBA", base.size, (255, 255, 255, 0))
    font = ImageFont.truetype("usr/share/fonts/truetype/ubuntu/Ubuntu-B.ttf", 325)
    draw = ImageDraw.Draw(text)
Let’s examine the above more closely:
Image.open()returns anImageobject. The.open()method opens and identifies the given image file.- Recall from earlier that the
.convert()method takes amodeparameter defining the type and depth of a pixel in the given image. Here, we use"RGBA"mode5 (4x8-bit pixels, true color with transparency mask). Image.new()create a new image. It takes themode,size, andcolorparameters. We useRGBAmode, and retrieve the size of the base image by calling thesizemethod. Note that thecolorargument takes RGBA values.ImageFont.truetype()loads a TrueType or OpenType font file (or file-like object), and creates a font object. I used Ubuntu-B.ttf from my dev machine, with font size325.ImageDraw.Draw()creates an objects for drawing in the given image. It can take two parameters:im, for the image to draw in, andmode(optional), which if omitted defaults to the given image mode. I passedbase, theImageobject, to this method.
Then, as shown below, I added the number text and created an alpha_composite image using base and text. The next step was to paste the barcode image.
Alpha Composite and Text Alignment
...
# add_nums.py

# add text
draw.text((0, 0), "201", font=font, fill="black")

# output alpha composite image
out = Image.alpha_composite(base, text)

# open and paste barcode image onto alpha composite image
bc = Image.open("barcodes/201.png")
out.paste(bc)
out.save("label-201.png")

...
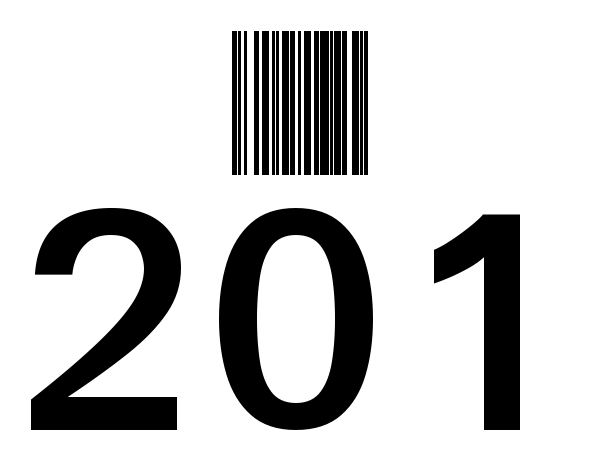
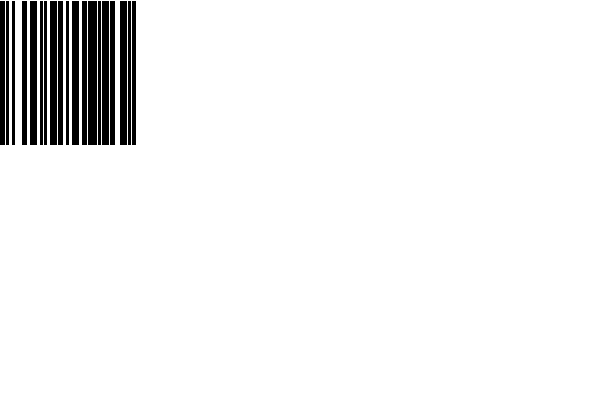
After saving the file and running python add_nums.py, I open label-201.png and get the following result.
Not quite right. That’s because the draw.text() method from above (in add_nums.py) takes as a first argument a 2-tuple, xy, as the anchor coordinates of the text. It can also take an anchor parameter6, a two character string, which determines the alignment of drawn text relative to the given xy coordinates. The default alignment is the top left.
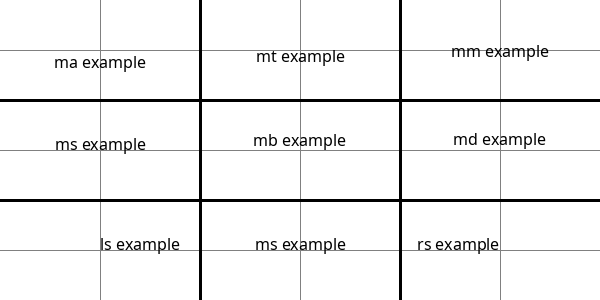
So, I want the anchor alignment to be in the center and at the bottom. Per the documentation, I should use the -m (middle) and -s (baseline) alignments, or simply -ms. I used the below picture as a reference.
Here is the modified python:
...
# add_nums.py

# add text
draw.text((0, 0), "201", anchor="ms", font=font, fill="black")

# output alpha composite image
out = Image.alpha_composite(base, text)

# open and paste barcode image onto alpha composite image
bc = Image.open("barcodes/201.png")
out.paste(bc)
out.save("label-201.png")

...
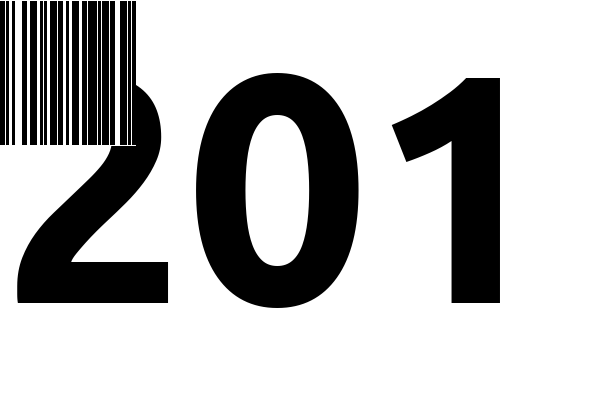
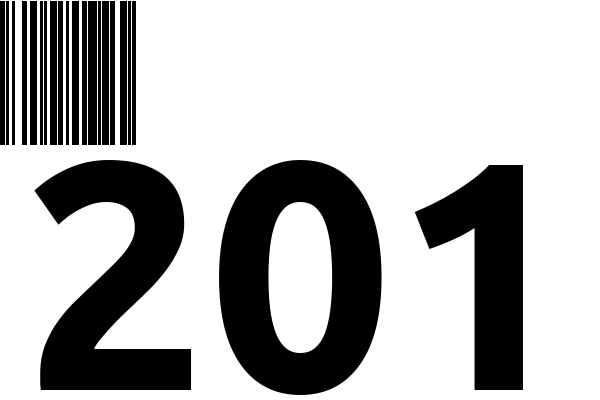
And the new image:
Now the number itself is missing. Why? Well, I left the anchor coordinates the same, (0, 0), and need to adjust them accordingly. Basically, I want the x coordinate to be half the length of the width of my base image, and the y coordinate to be slightly below the top of the image, say 10 pixels. That is,
- for
x, I’ll use x_text = 0.5 * base.width - for
y, I’ll use y_text = base.height - 10
Note that the anchor coordinates need an integer value, so I’ll type cast x_text to int. The modified python:
# add_nums.py
...
# get the (x,y) anchor coordinates of the text
x_text = int(0.5 * base.width)
y_text = base.height - 10

# add text
draw.text((x_text, y_text), "201", anchor="ms", font=font, fill="black")

...
And the new image:
Barcode Alignment
Much better. The text alignment looks great. At this point, the last step was to align the barcode.
The .paste() method takes an optional 4-tuple giving the region to paste into. One can also use a 2-tuple, it’s treated as the upper left corner[^7]. I chose to use a 2-tuple so I could take advantage of the bc.width and bc.height properties of the barcode image.
For my x coordinate of the 2-tuple, I wanted half width of the base image minus half the width of the barcode image. For the y coordinate, I wanted something like 5 pixels. Modifying my python yet again:
...

# open and paste barcode image onto alpha composite image
bc = Image.open("barcodes/201.png")
x_bc = x_text - int(0.5 * bc.width)
y_bc = 5
out.paste(bc, (x_bc, y_bc))
out.save("label-201.png")

...
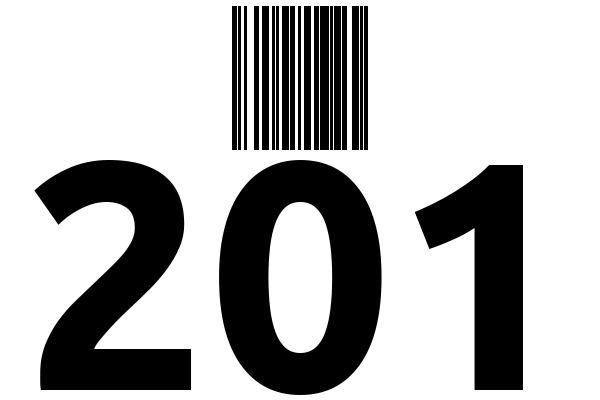
Running python add_nums.py now produces the final image:
Last Steps
Now that I had the desired output, I needed to add a for loop to generate all the final barcode/number images.
# add_nums.py
from PIL import Image, ImageDraw, ImageFont

with Image.open("base.png").convert("RGBA") as base:

    for i in range(200, 401):
        # load base image, font, and draw objects
        text = Image.new("RGBA", base.size, (255, 255, 255, 0))
        font = ImageFont.truetype("/usr/share/fonts/truetype/ubuntu/Ubuntu-B.ttf", 325)
        draw = ImageDraw.Draw(text)


        x_text = int(0.5 * base.width)
        y_text = base.height - 10

        # add text
        draw.text((x_text, y_text), str(i), anchor="ms", font=font, fill="black")

        # output alpha composite image
        out = Image.alpha_composite(base, text)

        # open and paste barcode image onto alpha composite image
        bc = Image.open("barcodes/" + str(i) + ".png")
        x_bc = x_text -  int(0.5 * bc.width)
        y_bc = 5
        out.paste(bc, (x_bc, y_bc))
        out.save(str(i) + "-label.png")
As a final step, I create a add_numbers function in my generate_barcodes.py file, and called it from the main() function. The full code is below.
Final Product
Update: I’ve added basic user interaction to the final script. After starting the program, the user inputs the first and last flag numbers to be generated. Again, it’s very basic, yet is better than manually hard coding the values.
import treepoem
from PIL import Image, ImageDraw, ImageFont

def generate_barcodes(x, y):
"""
Generates a set of natural number barcode images.

    A range of barcodes are generated between x and y,
    where x < y.
    """
    for i in range(x, y):
        barcode = treepoem.generate_barcode(
            barcode_type = "code128",
            data = str(i),
        )

        filename = "barcodes/" + str(i) + ".png"
        barcode.convert("1").save(filename)
        print ("Barcode " + str(i) + " created")
    print ("Barcode generation complete.")

def add_numbers(x, y):
"""
Generates final image with barcode and corresponding number.

    A range of images with barcodes and their corresponding natural number
    are generated between x and y, where x < y.
    """
    with Image.open("base.png").convert("RGBA") as base:
         for i in range(x, y):
             # load base image, font, and draw objects
             font_path = "/usr/share/fonts/truetype/ubuntu/"
             font_type = "/usr/share/fonts/truetype/abyssinica/AbyssinicaSIL-Regular.ttf"
             font_size = 350
             text = Image.new("RGBA", base.size, (255, 255, 255, 0))
             font = ImageFont.truetype(font_path + font_type, font_size)
             draw = ImageDraw.Draw(text)

             x_text = int(0.5 * base.width)
             y_text = base.height - 20

             # add text
             draw.text((x_text, y_text), str(i), anchor="ms", font=font, fill="black")

             # output alpha composite image
             out = Image.alpha_composite(base, text)

             # open and paste barcode image onto alpha composite image
             bc = Image.open("barcodes/" + str(i) + ".png")
             x_bc = x_text -  int(0.5 * bc.width)
             y_bc = 30
             out.paste(bc, (x_bc, y_bc))
             final_image = "labels/" + str(i) + "-label.png"
             out.save(final_image)
             print("Composite image created: " + final_image)

def main():
active = True
output = ""

    while active:
        try:
            first = int(input("Please enter the first number: "))
            last  = int(input("Please enter the last number: "))
            if first > last:
                error = "The first number must be less than or equal to second. Please try again."
                print(error)
            else:
                output = "Numbers and barcodes to be generated: %d to %d"%(first, last)
                active = False
        except ValueError:
            print("You must enter integers! Please try again.")
    print(output)

    x = first
    y = last + 1
    generate_barcodes(x, y)
    print("Creating composite images...")
    add_numbers(x, y)

main()
Conclusion
Something I would like to do: make this script interactive[^9], so a user can input the lower and upper bounds of the range for barcodes, and also add support for custom alpha-numeric labels as well. I’m sure logistics software already does all of this much more competently, but it was fun nonetheless.
Be sure to reach out if you have any questions, comments, or criticisms.
QR code is an abbreviation of Quick Response Code. ↩︎
For those interested, a binary image ‘can be interpreted as a subset of the two-dimensional integer lattice Z2’, also known as the |“square” lattice. ↩︎
Here are the respective pages for the modules: Image, ImageDraw, and ImageFont. Always carefully read available documentation :) ↩︎
…
 ↩︎
↩︎RGBAstands for red green blue alpha, because it is a three-channel, additive RBG color model with a supplemental fourth channel, the alpha channel. The alpha channel determines the opaqueness of each pixel, allowing for techniques like alpha compositing. ↩︎Note that the
anchorparameter is only supported by OpenType/TrueType fonts. The default (top left) alignment is used otherwise. ↩︎